User guide
Wizard interface
Once dbdesc has been installed you should have a new icon like this
 in your desktop. Double-click on it to launch dbdesc.
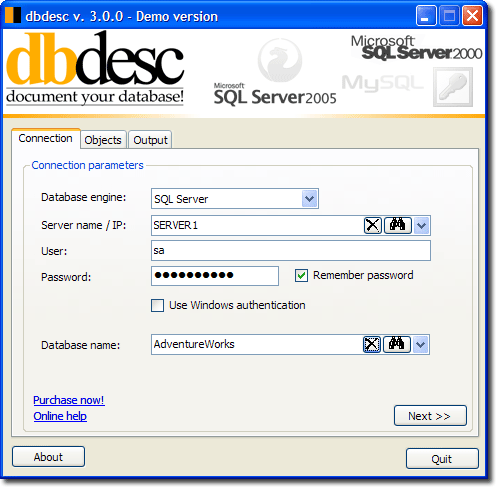
There are three tabs (connection, objects and output) where you can set the some options.
Connection options
Database engine: The first you need to specify is the kind of database you are going to document: SQL Server, MySQL, Access or Firebird.
SQL Server entry includes all the different SQL Server versions that dbdesc supports (SQL Server 2000, SQL Server 2005, MSDE and SQL Server 2005 Express).
Server name / IP: In this field you must type the server name or ip address where the database is hosted. If the database is hosted locally you can leave this field empty.
Next to this field there is a new button to auto-discover SQL Server instances in your network. In a few moments dbdesc will try to populate a list with all the reachable SQL Server instances. Note that this can take a few seconds.
SQL Server note: You must indicate the instance name which holds the database. For example SQL Server 2005 Express creates by default an instance name called SQLEXPRESS, so assuming that SQL Server is installed locally you should fill this field with ./SQLEXPRESS
MySQL note:This field is called hostname in MySQL. Note that if you are documenting a remote database, you must give access to your IP address to connect with the database.
User and Password: Type here the user and password that dbdesc will use to connect with the database. Note that to perform schema queries dbdesc must have administrative privileges over the database, therefore you will usually use the admin account: sa for SQL Server, Admin for Access and SYSDBA for Firebird. If you want to dbdesc remember your password check the option Remember password.
Use SQL Server authentication (only for SQL Server databases): Use your Windows user account to connect with the server.
Database name / file: Type or browse the database file.
Objects options
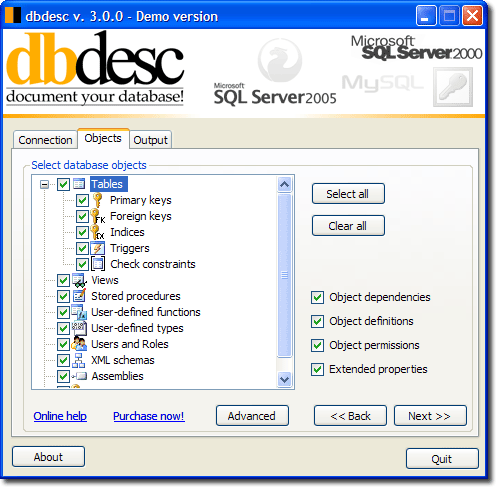
In this tab you can select what kind of objects you want to document.
Just mark what objects must be documented. At least one of the main kinds of objects
must be selected (tables, views, stored procedures, UDF or generators). You can also exclude individual objects through the Advanced button (see next section).
Advanced
Since version 2.0, dbdesc includes a new form to include/exclude individual database objects from the documentation. A full extended property editor is also included for SQL Server databases.
Individual object selection
You can include/exclude individual database objects from the documentation. Simply uncheck the objects that you don't want to document. Checking/unchecking a group will affect to each object in that group.
Your current selection will be used the next time you document this database.
If you need to change often which objects should appear in the documentation depending on who is the target audience, you can name your selection and use it any time.
Adding object descriptions (only for SQL Server and Firebird databases)
Now you can easily add descriptions to your database objects. Because these descriptions are used for documenting your database, you will get very easily much more descriptive database documentation.
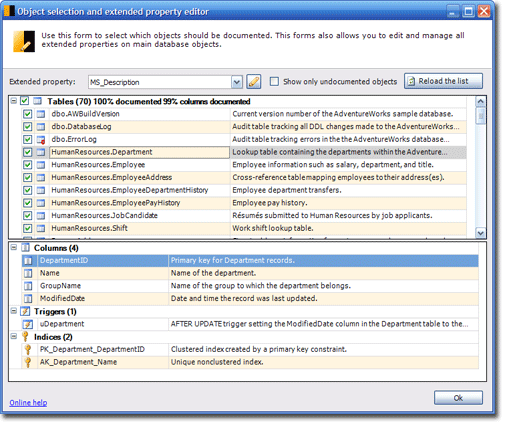
Each database object name has a right column where you can type the description of that object. You can expand this field to edit the description.
Your changes will be commited to the database each time you end editing a cell by changing the row or closing the form.
Unfortunately, Access databases do not expose its description field so dbdesc cannot add descriptions to Access objects.
Managing SQL Server extended properties
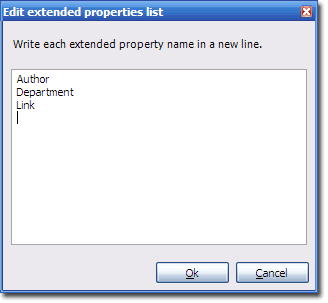
SQL Server uses the concept of extended properties to store additional info along with your objects. The object description we comment before matches an extended property called 'MS_Description'.
dbdesc allows you to add as many extended properties as you need. For example, if you want to document who is the author of each database object, you simply will need to add a new extended property called 'Author'. Click on the 'pencil' button to edit the list of extended properties. Put the name of the new extended property in each line.
Output options
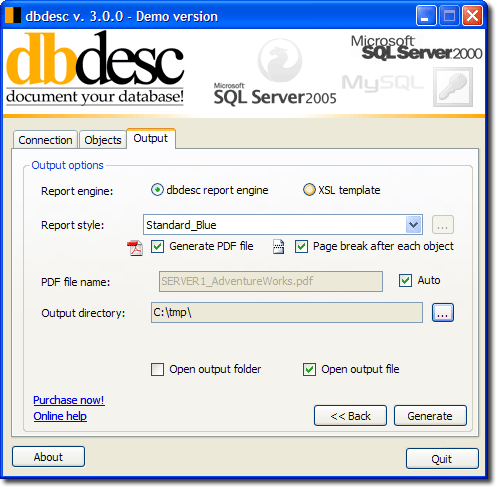
This tab allows you to choose between different output options.
dbdesc has two different report engines:
- a buil-in report generator and viewer: it produces nice looking, ready to print and browsable document. This document can be exported to PDF.
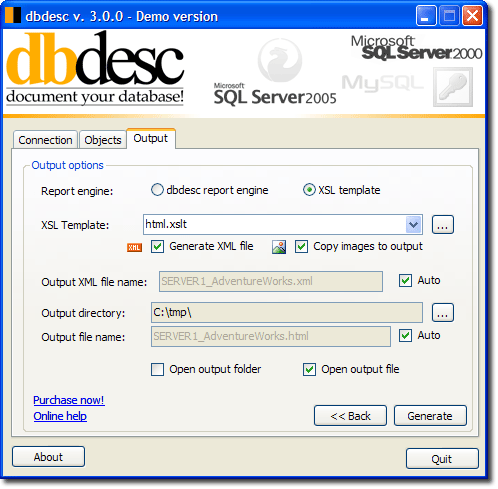
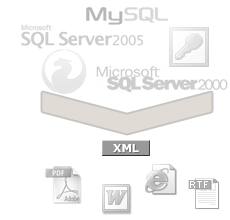
- a XSL parser: using XSL templates to process the database documentation and produce different types of documents. Sample templates are included to generate HTML, RTF and Word 2003 documents.
Built-in report
Report style: select one of the stylesheets provided or build your own.
Generate PDF: check this option if you want to export the report to a PDF file. If you check this option, you can choose the PDF file name or let dbdesc generate one automatically for you (based on the database server and database name).
Page break after each object: If checked, this option will insert
a page break after each object.
Style editor
dbdesc allows you to customize a bit the built-in report through the use of custom style sheets. Creating your own style sheets allows you to change fonts, colors, text alignments, headers, footers and even adding your logo to the cover page of the report.
To create a new style sheet, open the Report style list and select the first element: Create new report style...
Headers & footers: You can control the text that will appear on both headers and footers. Just type the text you want on the text boxes. There are special tags to include dynamic content:
- [DB_NAME]: Inserts the database name
- [SECTION_NAME]: Inserts the section name (Tables, Views, Stored procedures...)
- [PAGE_NUMBER]: Inserts the current page number
- [DATE]: Current date
Front page logo: Add an image to the bottom of the front page. Note that the image file must be accesible by dbdesc while the report is being rendered.
XSL templates
XSL template: In this combo you have a list of the default XSL templates that dbdesc includes. However you can select your own templates clicking in the right button and selecting them from the file system.
Output directory: dbdesc points by default to My documents folder. You can change it anytime clicking in the right button.
Output file name: By default dbdesc generates the file name output plus the appropriate file extension depending on the XSL template selected. If you want to manually choose the file name unselect the check box 'auto'.
Generate XML file: dbdesc extracts the database info to an in-memory XML document which is transformed with the XSL template. However you might find useful to get the XML source file for your own processing. Checking the option dbdesc will output the XML document to a file, too.
XML file name: The XML file name. It will be generated in the directory you selected before.
Copy images to output: Check this option to copy a special directory called dbdesc_images. It contains nice icons to be used with html templates.
And that's it. Just click 'Generate' and wait a few moments to get your database documented.
Additional options and features
Because probably you might want to see the results as soon as they are ready, you could check the option to open the generate file or the directory which holds the file.
Sometimes the process to document a database can last a few minutes, especially if you are documenting a remote database and it is a big database. Another scenario which can make the process last more than expected is if the server cannot be reached. dbdesc allows you to cancel the process at anytime. The button used to launch the process (Document) is transformed in the button that allows you to cancel it.
dbdesc from the command line
dbdesc can be executed from the command line. This is especially useful if you want to schedule dbdesc to document your databases, include dbdesc in a build process or to perform continuous integration.
Take a look at the dbdesc from the command line help for more information.

 DOWNLOAD NOW
 PURCHASE
NOW